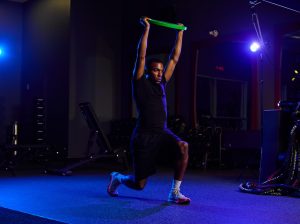
Fitness Lifestyle Unlock Your Athletic Potential: The Soccer Workout Every Athlete Should Try June 19, 2026 / June 30, 2026 by Anthony Cozzetto Unlock your athletic potential the soccer workout every athlete should try for speed, agility, and strength. Video included! Read more » MOVATI Performance Coach Soccer World Cup
Fitness In Club Lifestyle LETSMOVECANADA – 2026 NATIONAL HEALTH AND FITNESS DAY! June 5, 2026 / June 6, 2026 by Anthony Cozzetto Get out and get active to celebrate National Health and Fitness Day on Saturday, June 6th at your local MOVATI Athletic club. National Health and Fitness Day is a celebration of the importance of physical activity, healthy living, and building stronger communities through movement. It’s a reminder that every step, stretch, lift, and workout contributes to […] Read more » Fitness Healthy Lifestyle MOVATI National Health and Fitness Day
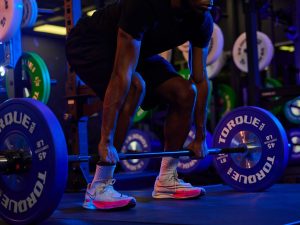
Fitness Train Like a 2026 Olympian: MOVATI Athletic’s Winter Games Inspired Program January 22, 2026 / March 10, 2026 by Anthony Cozzetto The 2026 Winter Olympics in Milano Cortina, Italy are set to be one of the most exciting editions of the Games in recent memory. From February 6–22, elite athletes from across winter sports will compete in 116 events across venues in Milan and the Italian Alps with new disciplines like ski mountaineering taking center stage […] Read more » MOVATI Olympic
Fitness Lifestyle Wellness Crush Your 2026 Fitness Resolution This New Year with These 10 Tips December 15, 2025 / March 10, 2026 by Anthony Cozzetto Is regular physical activity one of your 2026 New Year’s Resolutions? Has it also been a resolution in the past, only for your motivation to fizzle out until you stopped doing it completely? We understand, and that’s why we are sharing these amazing tips to help keep you motivated not just for a few weeks […] Read more » 10 Tips 2026 Fitness MOVATI New Year Resolution
Fitness 11 Holiday Nutrition Tips to Stay Healthy Without Missing the Festivities November 28, 2025 / March 10, 2026 by Anthony Cozzetto The holidays can be a challenging time of year for many, especially when you are watching what you eat and focusing on having balanced meals. During this time, it can be hard to control what food you’re served, alcohol is abundant, and it can be difficult to refrain from binging when everyone else is loading up […] Read more » MOVATI Nutrition
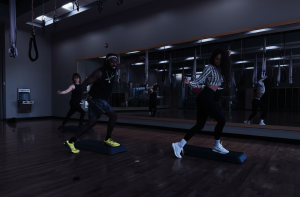
Fitness NEW CLASS FORMAT: STEP UP November 25, 2025 / March 31, 2026 by Anthony Cozzetto Step UP brings hip hop energy to the step for a vibing workout. Move through easy-to-follow step combos set to upbeat tracks that get your heart pumping, then step it up for the final 10 minutes with resistance band training to strengthen and sculpt the lower body. A balanced mix of cardio, strength, and rhythm—all […] Read more » Group Fitness MOVATI Step Up
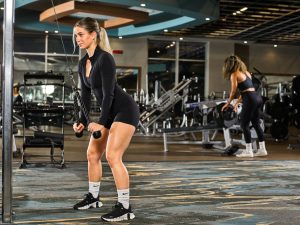
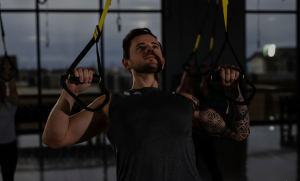
Fitness In Club Start Strong, Start Confidently! Book Your Game Plan Session Today! October 28, 2025 / March 10, 2026 by Anthony Cozzetto Whether you’re new to fitness or an experienced enthusiast, building a successful workout routine requires a thoughtful approach that considers your individual needs and goals. At MOVATI we put our members first by providing them with a strong start to their fitness journey. As part of every membership, you’ll receive an annual complimentary Game Plan Session […] Read more » Game Plan Session GPS MOVATI Performance Coach
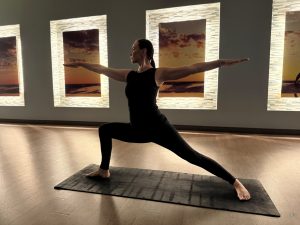
Fitness Lifestyle Welcome to Your Sanctuary of Peace & Possibility – MOVATI Yoga hOMe Retreat October 16, 2025 / March 10, 2026 by Anthony Cozzetto There’s a power in pressing pause. A moment to reconnect. A space to breathe, move, and simply be. This fall, MOVATI invites you to give yourself that gift. Join us for the MOVATI Yoga hOMe Retreat — a full-day immersive yoga Retreat designed to move your body, mind, and soul. Sunday, November 2 Glenerin Inn […] Read more » hOMe MOVATI Retreat Yoga
Fitness Lifestyle The Mental Health Benefits of Exercise October 9, 2025 / March 10, 2026 by Anthony Cozzetto How do you feel after a workout? Even when you’re purple faced and desperate for a lie-down, you feel pretty pleased with yourself after giving it a go, right? Once the initial breathlessness subsides after a workout, it’s common to feel like you have more energy, and those troublesome problems might not seem quite so […] Read more » Exercise Mental Health MOVATI
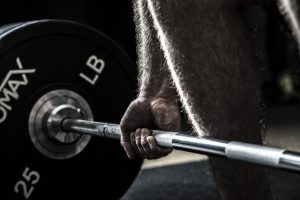
Fitness In Club Celebrating Our 2025 Summer Shape Up Winners! September 24, 2025 / March 10, 2026 by Anthony Cozzetto The summer of 2025 has been one for the books at MOVATI Athletic. Our annual Summer Shape Up Challenge brought members together across all clubs to push past limits, build healthy habits, and unlock their strongest selves. We’re proud to introduce and celebrate our July and August Summer Shape Up Winners! July Winners Patricia Mavroyannis […] Read more » MOVATI Performance Coach Summer Shape Up